The following article explains, how to use OCL constraints on an existing model in order to validate the model, which is created by a graphical editor supplied by GMF. The explanations are based on a simple EMF/GMF project, which is explained here.
Necessary OCL plugins
Install the package “OCL Examples and Editors”:
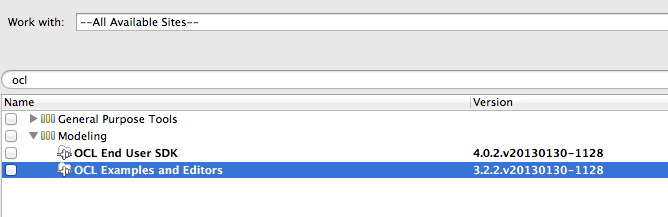
Install the package OCL Examples and Editors.
How to use OCL in the project
The project we created in the previous tutorial lets us create simple business processes, including “events” and “processSteps”. Right now there is no order, an event may follow and event and a processStep may follow a processStep. In this example we are going to add constraints, which define, that an event only follows a processStep and a processStep only follows an event.
OCL uses a specific language to define constraints, a good overview may be found here:
The model which is used looks like this:
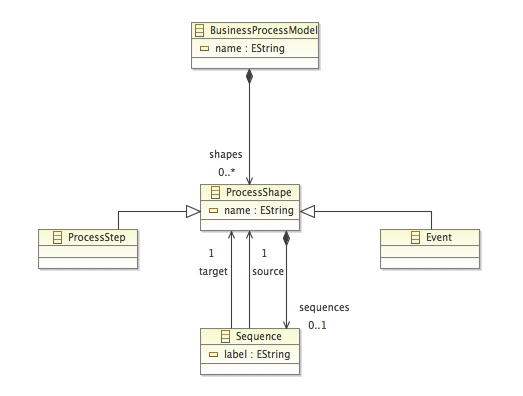
UML representation of the model.
The ProcessShapes are linked using the Sequences. The Sequences has a target and a source. We need to define constraints, which do the following:
- if the type on source is Event, the type on target needs to be ProcessStep
- if the type on source is ProcessStep, the type on target need to be Event
Using the OCL syntax, these statements will look like this:
invariant constraint1: source.oclIsTypeOf(Event) implies target.oclIsTypeOf(ProcessStep);
invariant constraint2: source.oclIsTypeOf(ProcessStep) implies target.oclIsTypeOf(Event);
“oclIsTypeOf” compared the used type, we check the type on the source and the type on the target.
Add OCL to the EMF/GMF project
Right-click the .ecore file in the project. Click on “Open With” and choose “OCLinEcore Editor”.
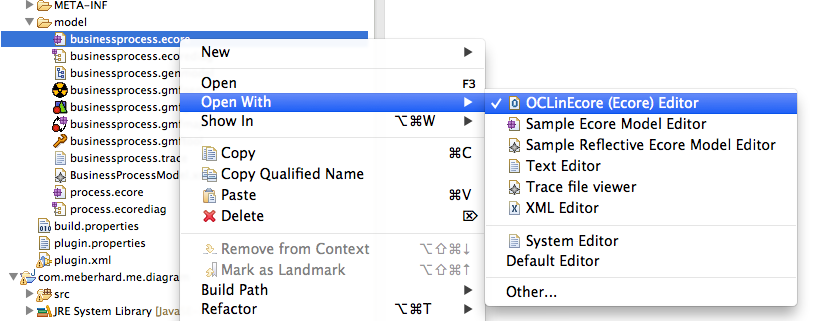
Open the .ecore file using the OCLinEcore Editor.
The file should look like this:
package businessprocess : businessprocess = 'http://businessprocess/1.0'
{
	class BusinessProcessModel
	{
		attribute name : String[?] { ordered };
		property shapes : ProcessShape[*] { ordered composes };
	}
	class ProcessStep extends ProcessShape;
	class Event extends ProcessShape;
	class _'Sequence'
	{
		attribute label : String[?] { ordered };
		property target : ProcessShape { ordered };
		property source : ProcessShape { ordered };
	}
	class ProcessShape
	{
		attribute name : String[?] { ordered };
		property sequences : _'Sequence'[?] { ordered composes };
	}
}
We need to add our constraints to the “Sequence class”, the file should look like this after:
package businessprocess : businessprocess = 'http://businessprocess/1.0'
{
	class BusinessProcessModel
	{
		attribute name : String[?] { ordered };
		property shapes : ProcessShape[*] { ordered composes };
	}
	class ProcessStep extends ProcessShape;
	class Event extends ProcessShape;
	class _'Sequence'
	{
		attribute label : String[?] { ordered };
		property target : ProcessShape { ordered };
		property source : ProcessShape { ordered };
		invariant constraint1: source.oclIsTypeOf(Event) implies target.oclIsTypeOf(ProcessStep);
		invariant constraint2: source.oclIsTypeOf(ProcessStep) implies target.oclIsTypeOf(Event);
	}
	class ProcessShape
	{
		attribute name : String[?] { ordered };
		property sequences : _'Sequence'[?] { ordered composes };
	}
}
Save the file and close it. The next step is to open the .genmodel file, right click on the first element in the list and click on “Reload”:
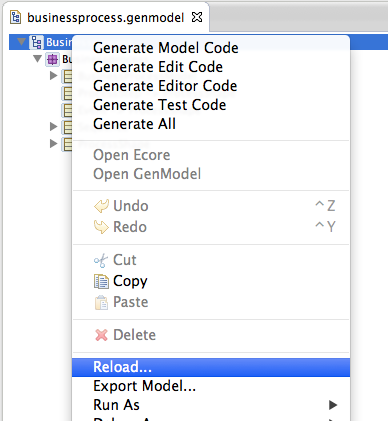
Reload the .genmodel file after applying changes to the .ecore model.
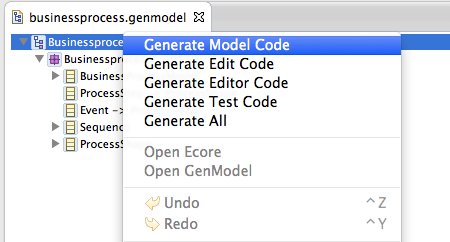
A dialoge will open, during the first step select “Ecore model”, in the second step you need to select the .ecore model we just amended. Clicking on “Finish” will reload the .genmodel. Right-click on the same element again and click “Generate Model Code”:
Generate Model Code after reloading the .genmodel.
This will create new model code, including the OCL constraints we added. If you already have a .diagram project, delete it now, since we need to recreate it. Open the .gmfgen file of the project, and view the properties of “Gen Diagram BusinessProcessModelEditPart”:
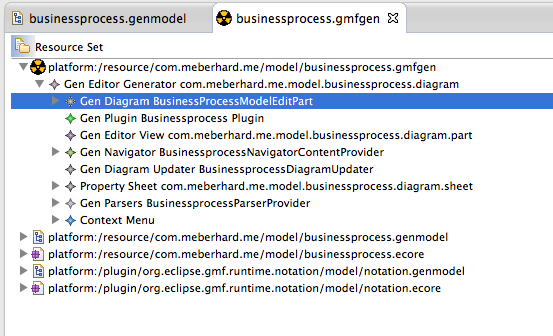
View the properties of “Gen Diagram BusinessProcessModelEditPart”.
Use the properties to search the group “Diagram” and change the values “Validation Decorators” and “Validation enabled” to “true”.
Set Validation Decorators and Validation Enabled to true.
Save the .gmfgen file, right click the first element and click on “Generate diagram code”.
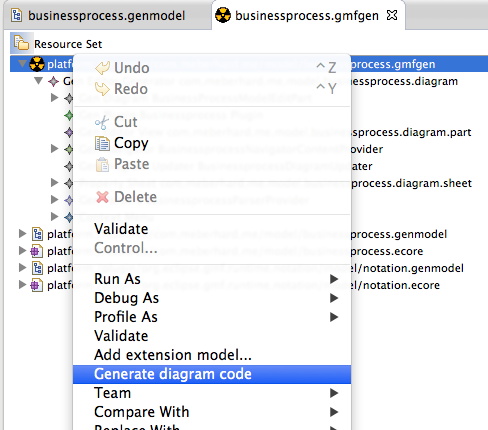
Generate the new diagram code.
Right click the .diagram project and run it as an eclipse application. After the application launched, add a new file and select “Businessprocess Diagram”:
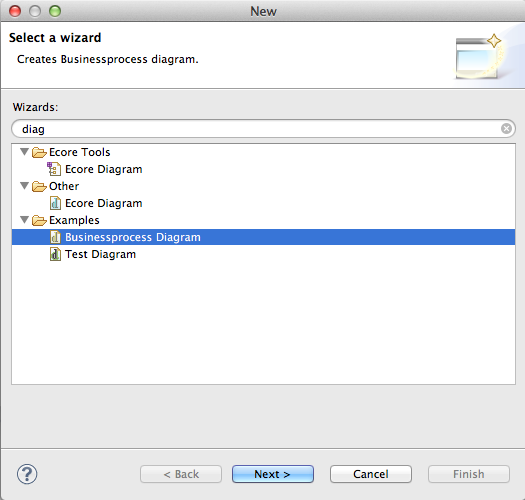
Add a businessprocess diagram file.
Click on “Window”, “Show View” and select “Problems”. The problems-view will inform us, if the model violates our OCL-constraints.
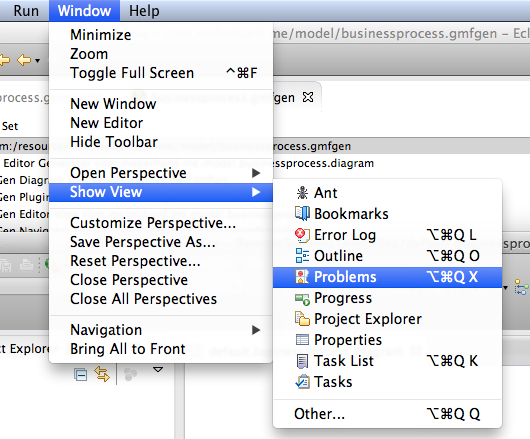
Add the problems view to see OCL constraint violations.
After this is done, we can try the validation. Add two events and link them – this is not valid because an Event should be followed by a ProcessStep.
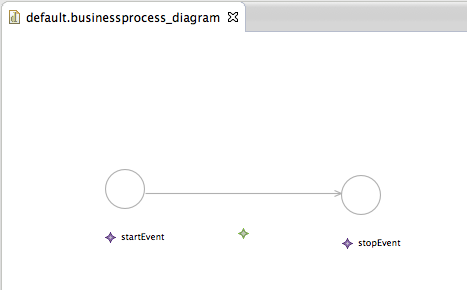
Add an invalid process linking an Event to an Event.
Use the Eclipse menu, click on “Edit”, then on “Validate”:
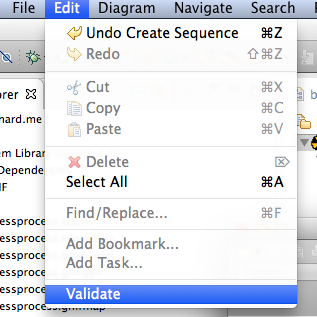
Validate the business process.
After validation, the sequences between the elements will be marked:
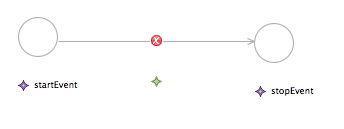
Invalid sequence between two Events.
Furthermore, the problem view informs us, that the current business process violates constraint2:
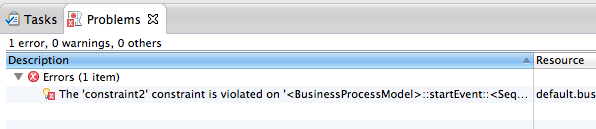
The problem view informs about the OCL constraint violation.