Here are some clues, how to use node.js and bower in the jIDEA IDE. I need to use it for managing packages in a project for my bachelor thesis. There I use the set up to manage libraries like angularjs, bootstrap and lawnchair.
Nodejs installlation and plugin support in jIDEA
First of all, install node.js – the installer files are provided from their homepage. After that, open jIDEA and go to the settings (IDE Settings -> Plugins) and make sure that “NodeJS” is installed – if not, install it from here:

Install the NodeJS plugin from the settings.
Install bower
In my case (Mac OS 10.9.2), node.js was installed to /user/local/bin. Install bower globally by running the following in command line:
/user/local/bin/npm install -g bowerYou will maybe require admin/sudo rights to run this command! The output in the command line will show, if the installation was successful.
Use bower package manager in a project
Assuming you already added the project in jIDEA, use the command line and cd the project directory. Simply run
bower init
some questions need to be answered on the command line – after that the bower.json file will be added to the project root. Now you can go back to the IDE and open the settings (Project Settings -> JavaScript -> Bower). Fill out the three required fields “Node interpreter”, “Bower executable” and “bower.json”.
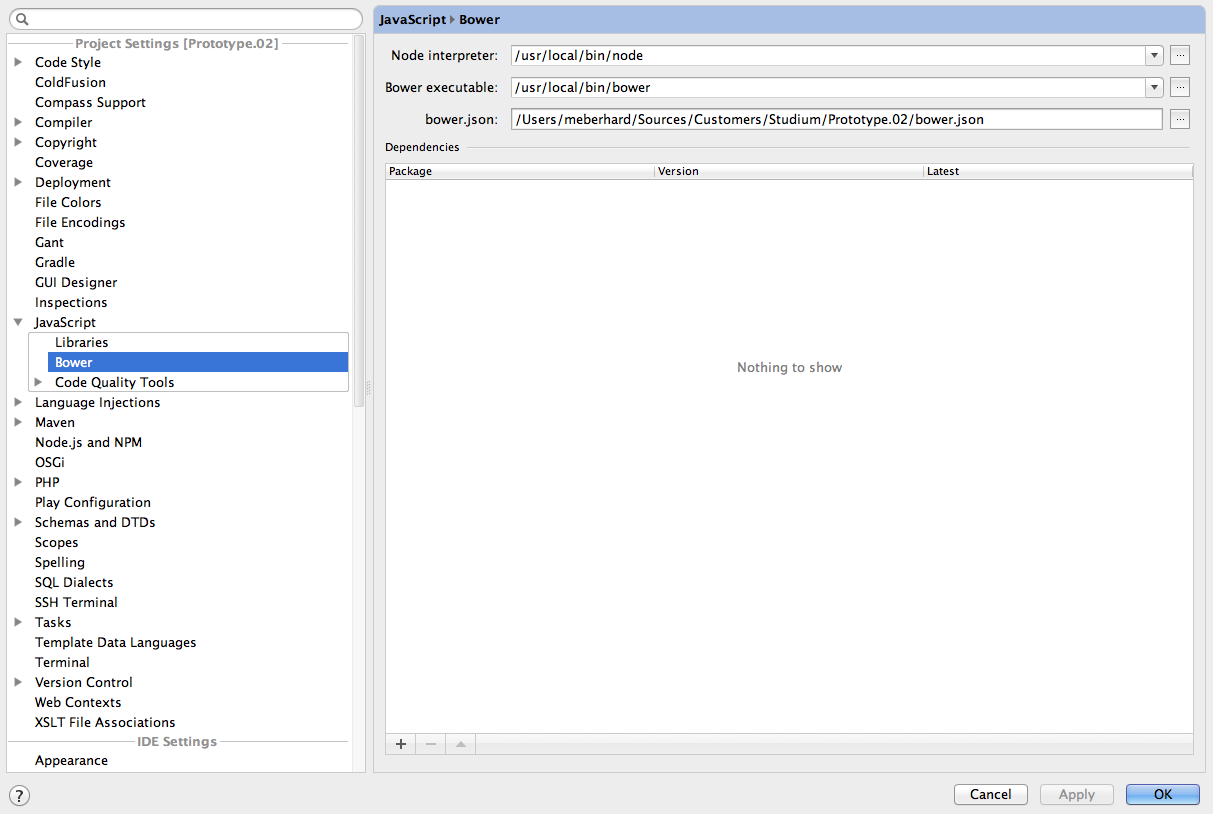
Make the settings for bower in jIDEA.
Add packages with bower
Since bower is set up for the project, you can easily add packages. From the projects settings you may click the plus, to add a package. After clicking the plus, another window will open showing all the available packages. A great benefit is also the dependency management – if you install a package which depends on another package – the dependency will be installed automatically.