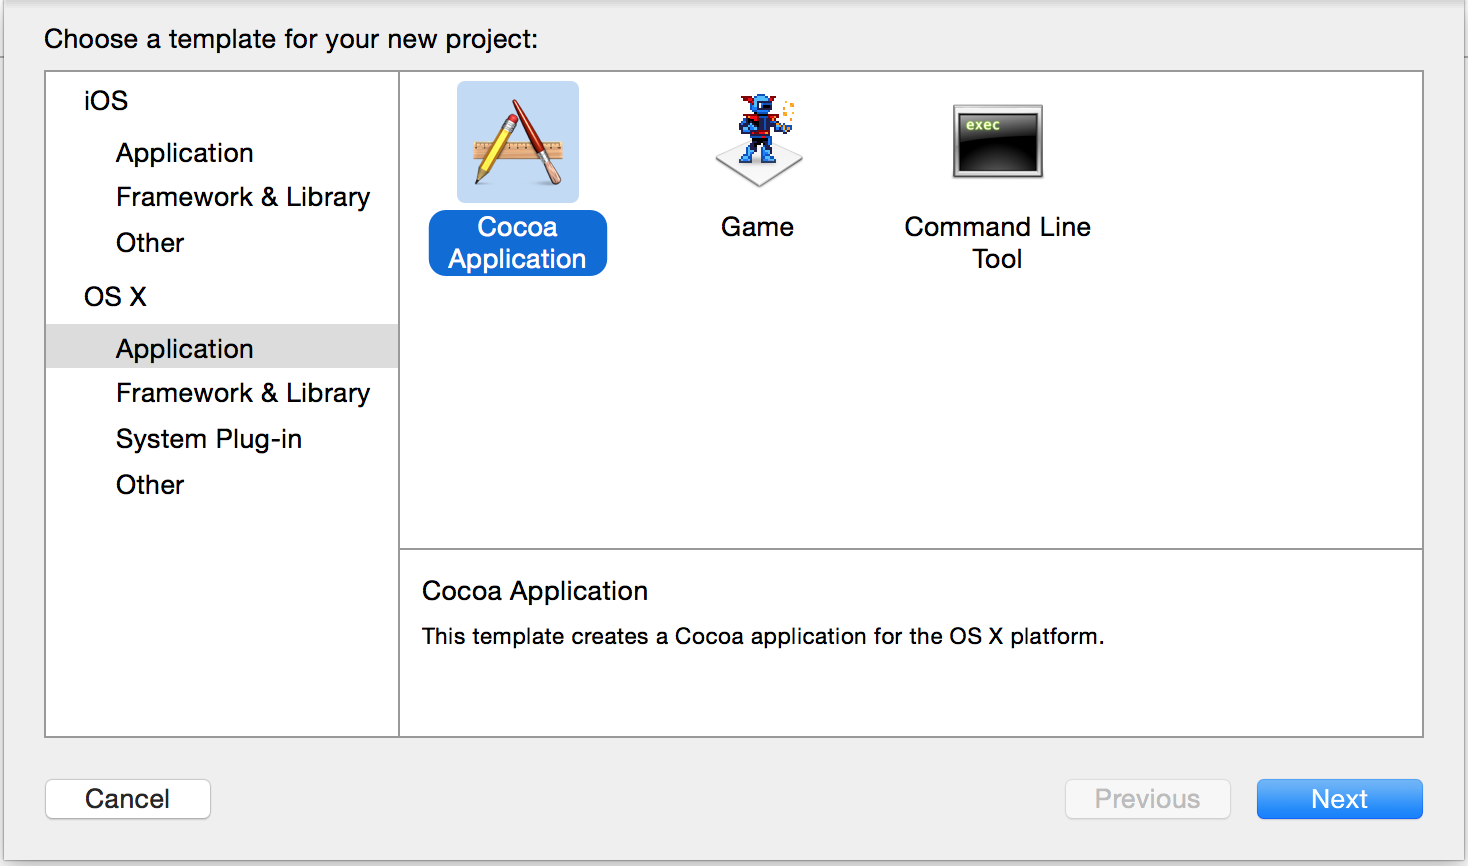
The first part of the objective-c tutorial focuses on the basic creation of the application. In XCode, add a new project. Select “Cocoa Application” under “OS X”.
Add a new project in Xcode.
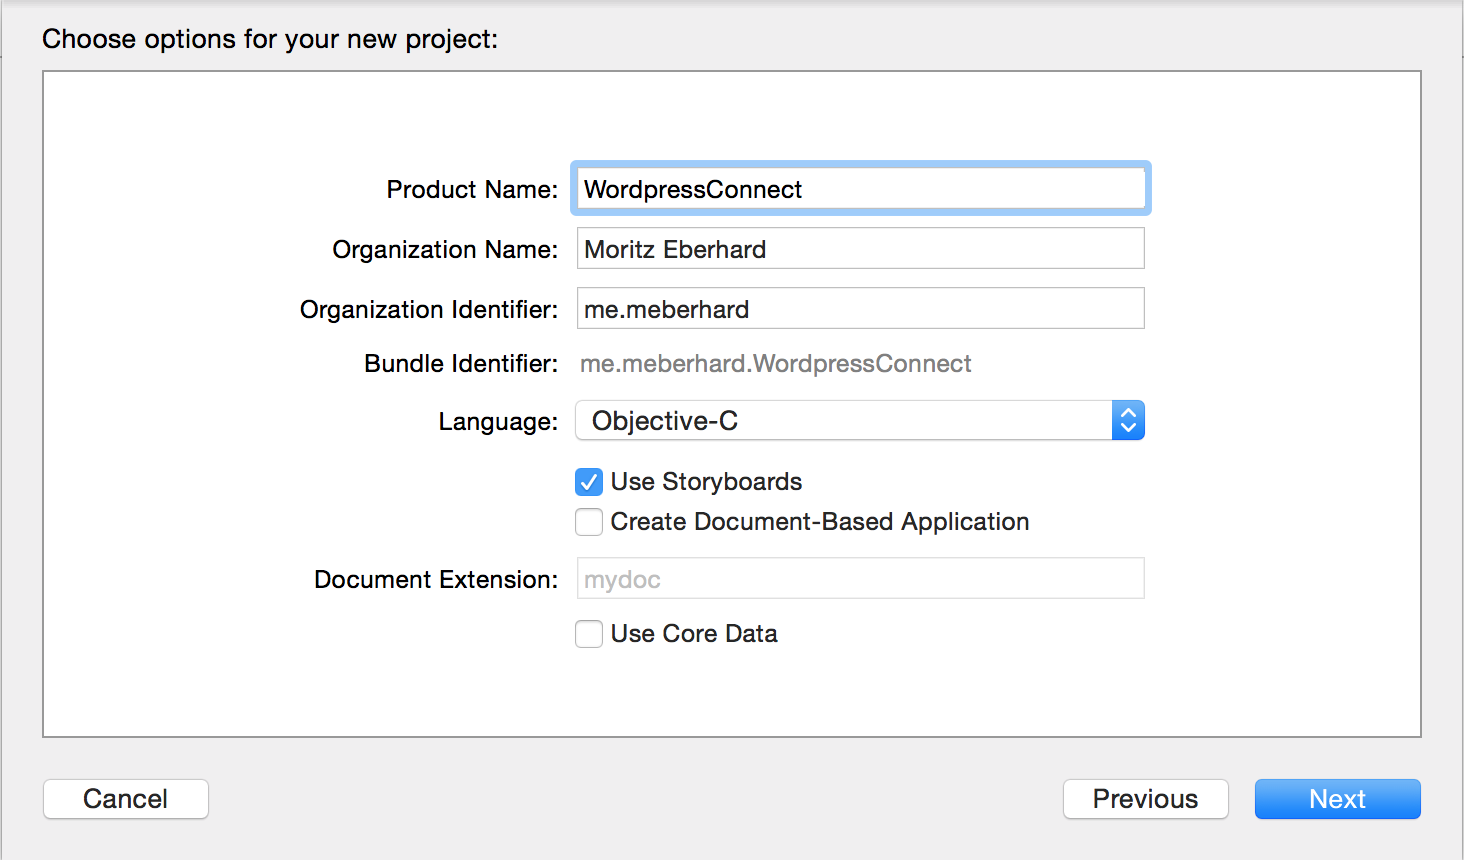
The next step requires you to enter a product name. I choose “WordPressConnect”, but the name really does not matter. Everything else can be left like it is.
Second step of adding the project in Xcode.
The last step requires you to select a folder, where all the sources will be saved. Click “Create” after.
Creating the View
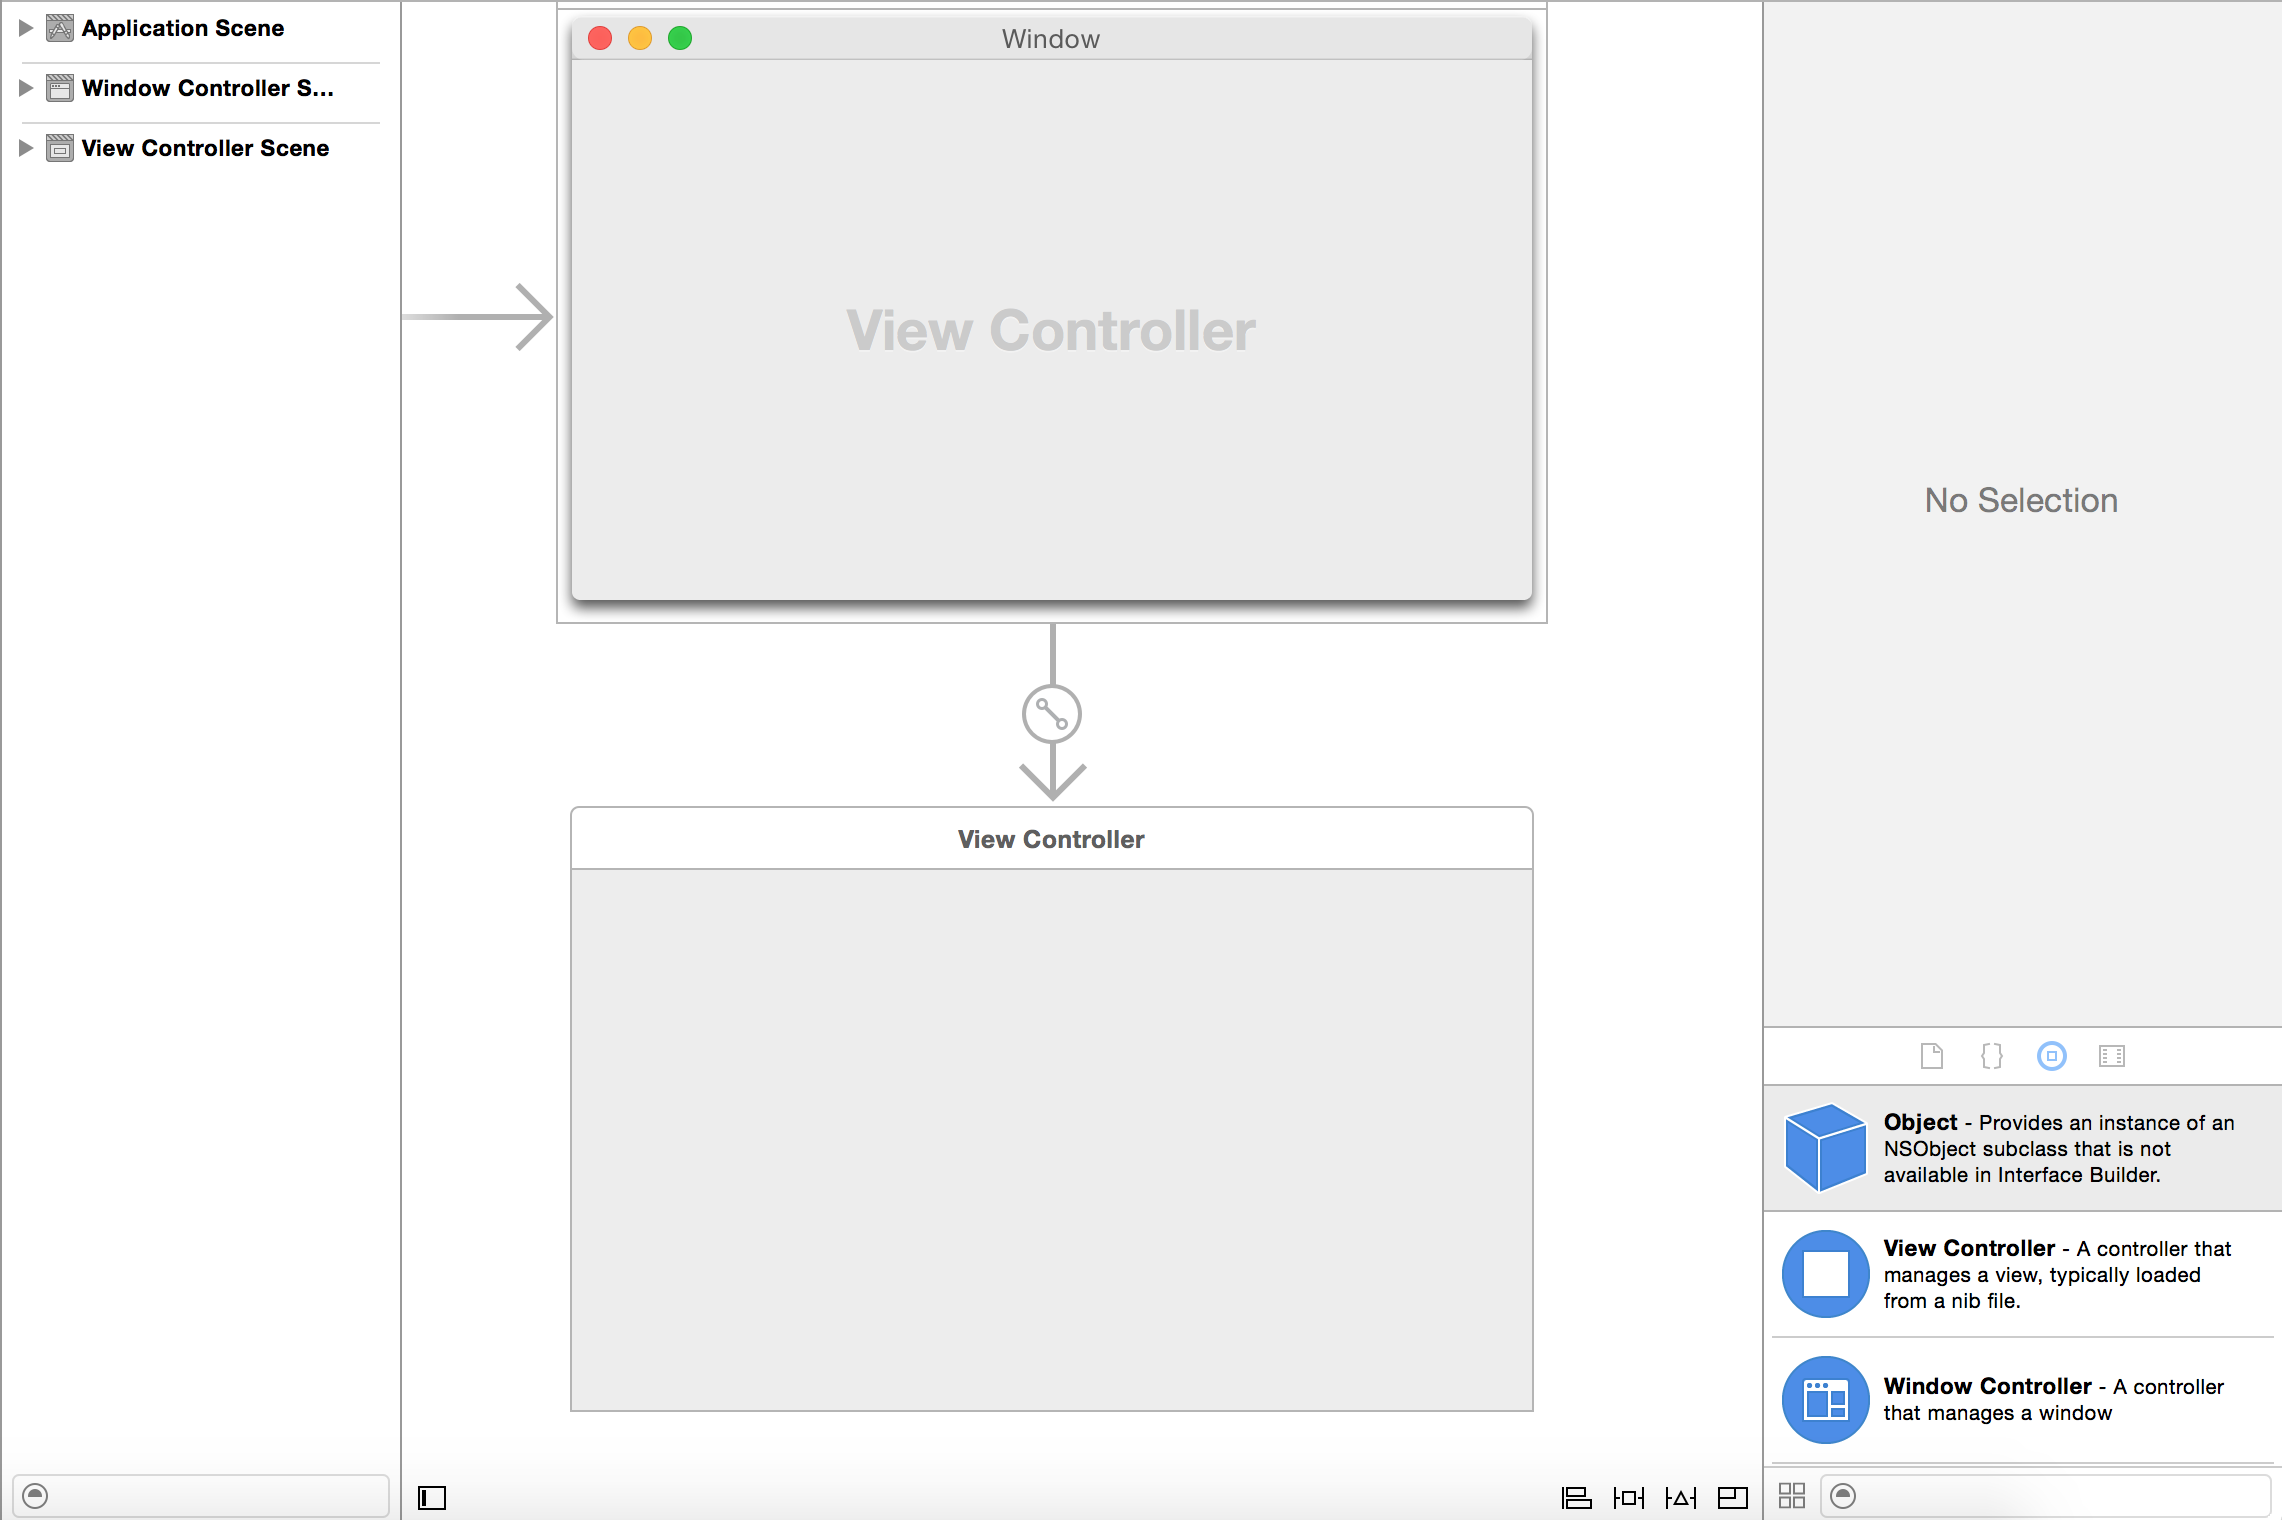
The basic idea is to have two tables in the view (objective-c coding will follow after). The first table shows the id and the title of the post, the second table shows the id and text of a comment. After creating the project, this view can be created using the storyboard. Select the Storyboard from the project files. A view will open which shows the window.
The storyboard in the Xcode project.
Search for “table” in the right bottom. All elements, which can be used for creating views are listed here. Drag two “Table View” elements to the area which says “View Controller”. After adding the tables, you may double click the table header area to write some headings like “Post Id”, “Post title”, “Comment Id” and “Comment Text”. After doing so, we need to add identifiers, so we know which tables is which. Select a “Table View” (very easy using the tree structure on the left side called “View Controller Scene”), select the first “Table View” and add an identifier using the inspector on the right side (third register). I used “TablePosts” as identifier.
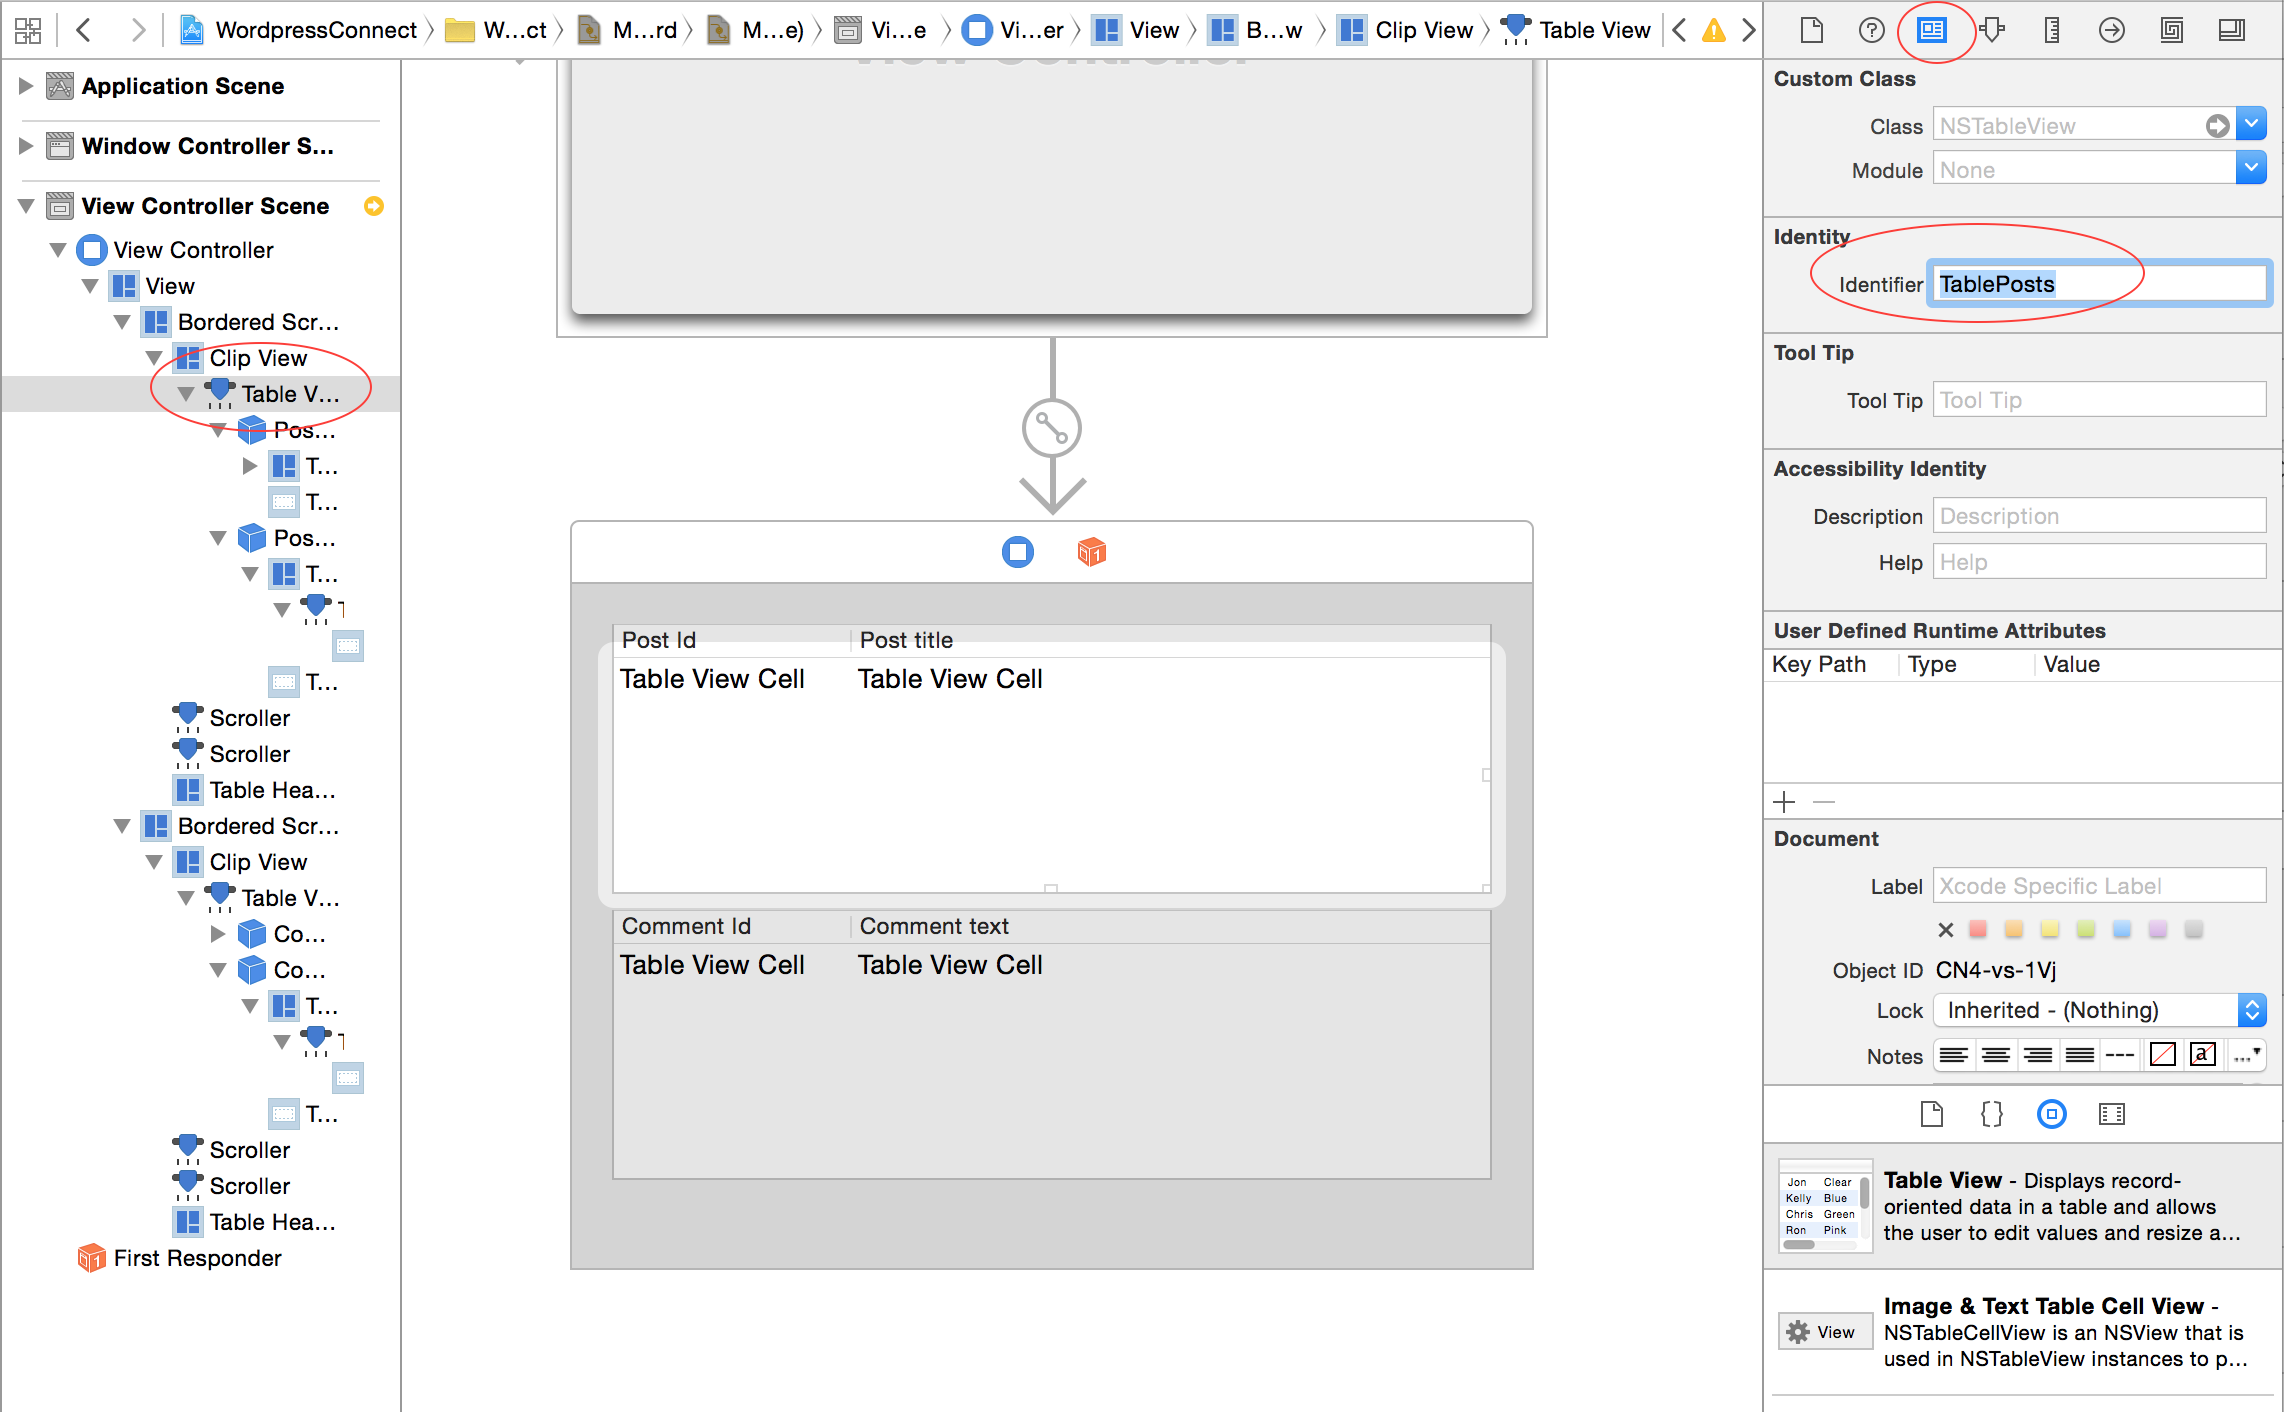
Adding table views to the storyboard.
For the second table, use “TableComments” as identifier. After that, select the columns and also give them identifiers. I used the following identifiers: “ColumnPostId” and “ColumnPostTile” for the two columns in the first table. “ColumnCommentId” and “ColumnCommentText” for the two columns of the second table. The identifiers give us the possibility, to identify correct tables and columns later in the objective-c implementation.
Now we need to connect the two tables with the ViewController, in order to fill them. Open the file “ViewController.h” and add the following objective-c properties between “@interface” and “@end”:
@property (nonatomic, strong) IBOutlet NSTableView *tablePosts;
@property (nonatomic, strong) IBOutlet NSTableView *tableComments;
In Xcode you might see two circles next to these properties. We can use them to make the connection between the view and the variables. There is a possibility to show two files next to each other in the IDE (two circles). Click it, choose for the left side the storyboard and for the right side the file ViewController.h.
Select in the tree view on the left side of the storyboard the first “Table View”, which represents the tables for the posts. After, click within the circle of the variable “tablePosts” and drag the line onto the table of the storyboard you just selected.
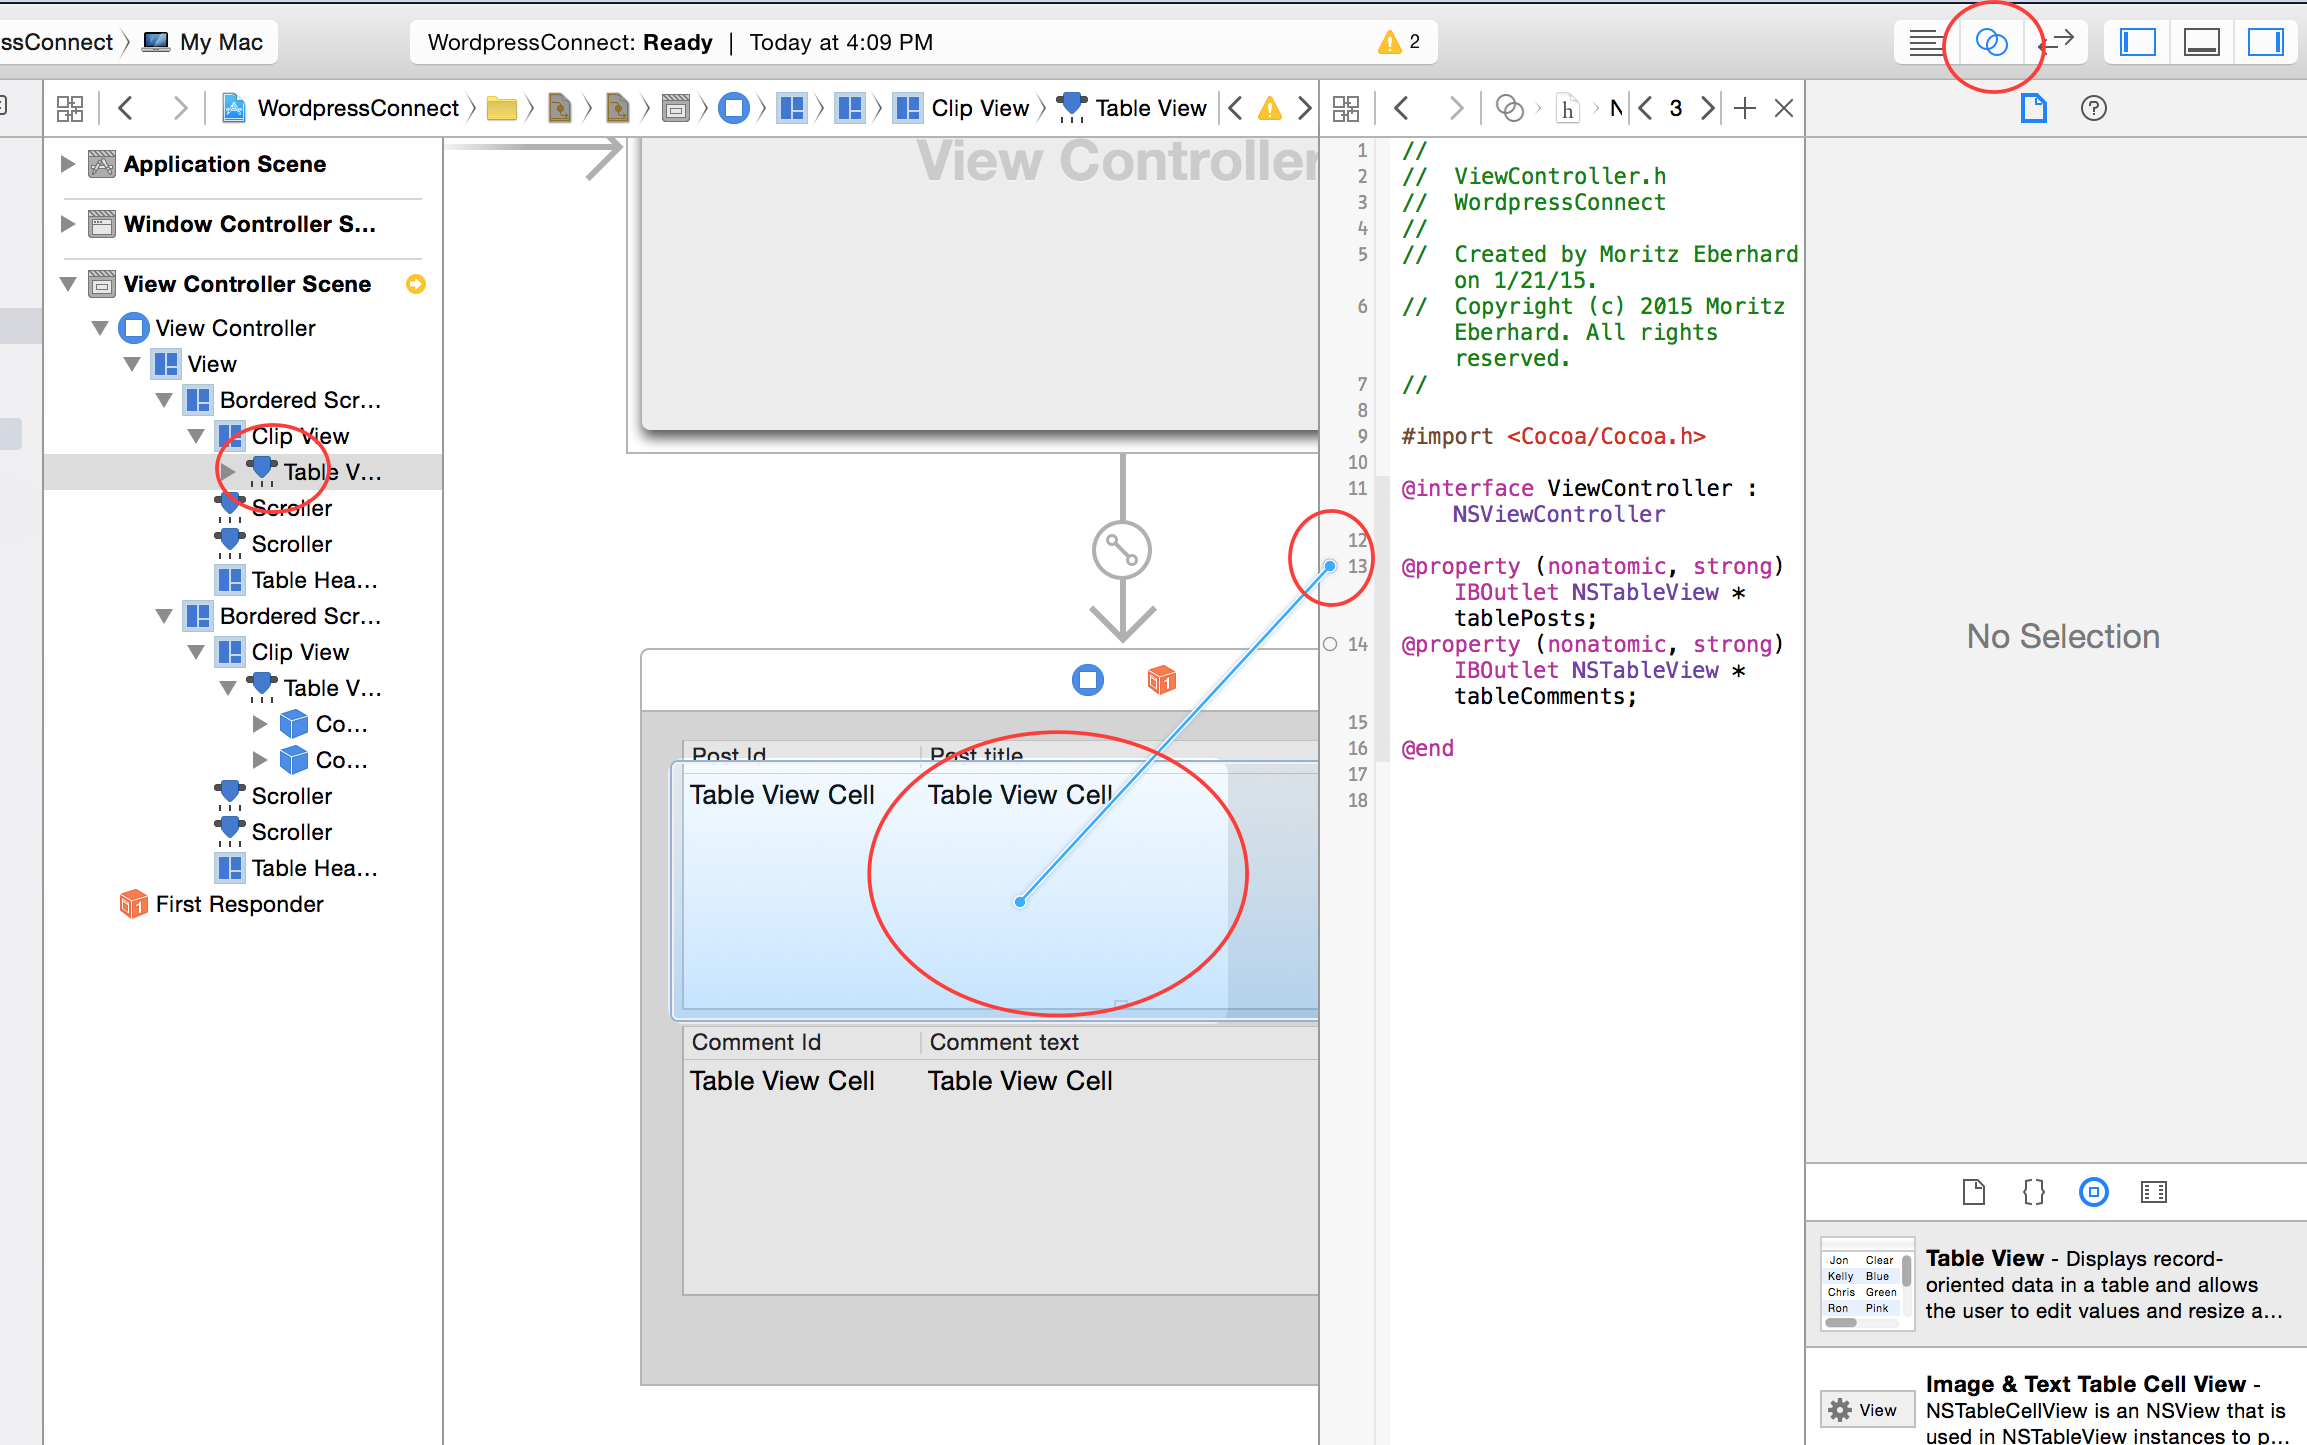
Connect the storyboard with ViewController variables.
Do the same with the second table – used to display comments – and connect the variable “tableComments”. Run the application using the keys “cmd” and “R”, the following window should open:

Sample window after first run.
Add the models – some objective-c coding
Since we want to deal with posts and comments, we are going to add very simple models for this purpose. The objective-c code will follow. In your project, add a group called “Model”. Right-click the folder, select “New File” and choose “Cocoa Class”. Call the class “Post” and select “NSObject” as “Subclass of”.
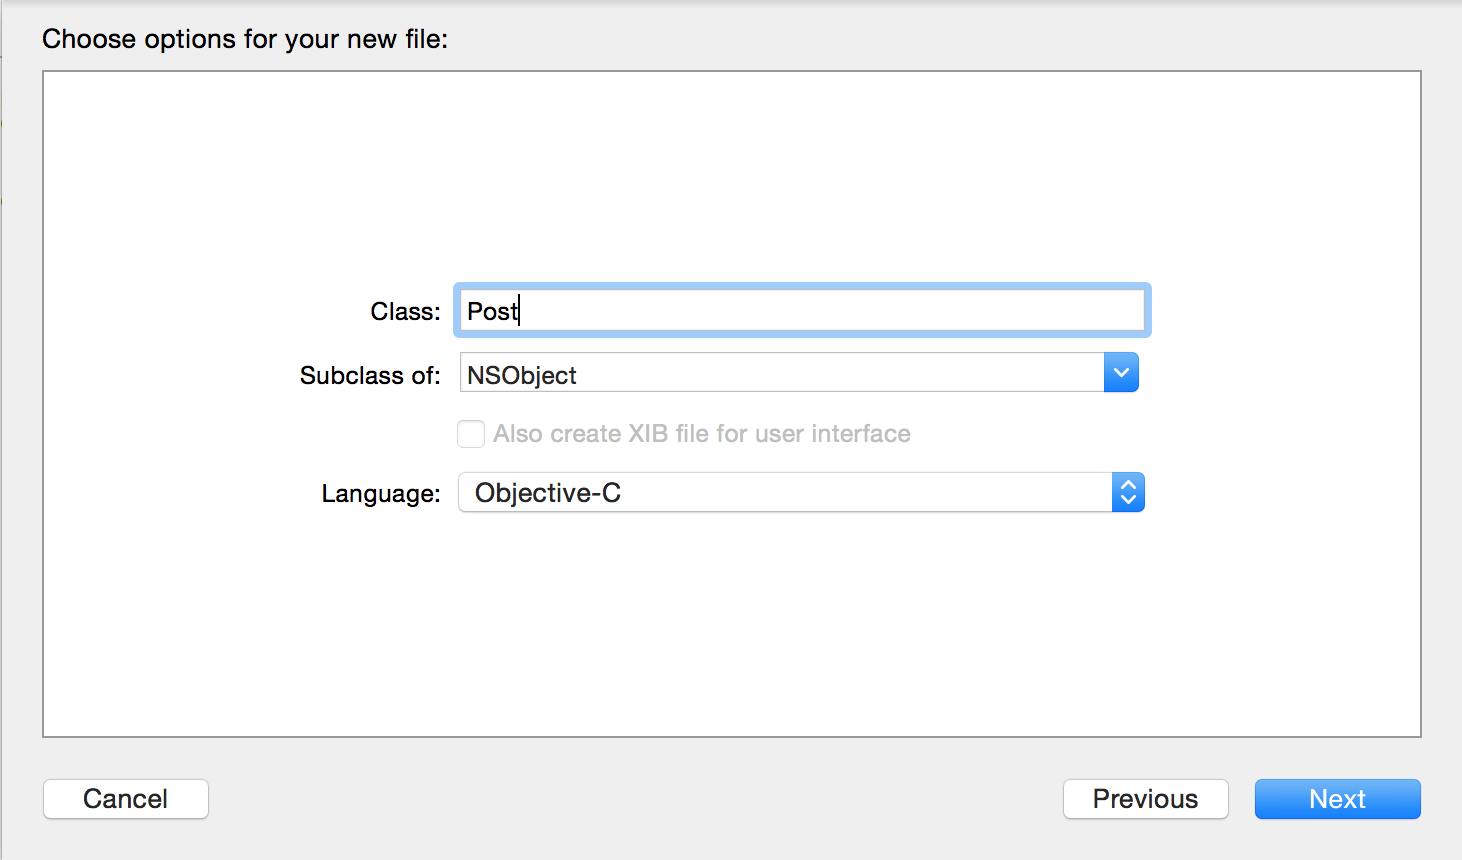
Add a class for the Posts.
Add another class the same way and call it “PostComment”, it will be used for the comments. After doing so, the structure of your project should look like this:

Project structure after adding model classes.
The properties and methods for the classes are rather easy. We will just store the postId, the post title, the comment id and comment text. We also need to know, to which post a comment belongs. See the objective-c code here:
Post.h
#import <Foundation/Foundation.h>

@interface Post : NSObject

@property (nonatomic, assign) NSInteger postId;
@property (strong) NSString *title;

- (id)initWithIdAndTitle:(NSInteger)postId title:(NSString*)title;

@end
Post.m
#import "Post.h"

@implementation Post

- (id)initWithIdAndTitle:(NSInteger)postId title:(NSString *)title {
    if (self = [super init]) {
        self.postId = postId;
        self.title = title;
    }
    return self;
}

@end
PostComment.h
#import <Foundation/Foundation.h>

@interface PostComment : NSObject

@property (nonatomic, assign) NSInteger comId;
@property (nonatomic, assign) NSInteger postId;
@property (strong) NSString *text;

- (id)initPostCommentWithComIdAndPostId:(NSInteger)comId postId:(NSInteger)postId text:(NSString*)text;

@end
PostComment.m
#import "PostComment.h"

@implementation PostComment

- (id)initPostCommentWithComIdAndPostId:(NSInteger)comId postId:(NSInteger)postId text:(NSString *)text {
    if (self = [super init]) {
        self.comId = comId;
        self.postId = postId;
        self.text = text;
    }
    return self;
}

@end
The classes contain the properties, which store the required information and method for creating object instances. Let’s add some Posts and Comments at runtime. Open to “AppDelegate.m”. The method “applicationDidFinishLaunching” will be called after the application launched (huh, qu’elle surprise). We can use this method to create some Posts and PostComments as mock-data after the application launched. First, import “Post.h” and “PostComment.h”. After, add some objective-c code to create the required objects:
AppDelegate.h
#import <Cocoa/Cocoa.h>

@interface AppDelegate : NSObject <NSApplicationDelegate>

@property (strong) NSMutableArray *allPosts;
@property (strong) NSMutableArray *allComments;

@end
AppDelegate.m
#import "AppDelegate.h"
#import "Post.h"
#import "PostComment.h"

@interface AppDelegate ()

@end

@implementation AppDelegate

- (void)applicationDidFinishLaunching:(NSNotification *)aNotification {
    // Insert code here to initialize your application

    Post *post1 = [[Post alloc]initWithIdAndTitle:1 title:@"post 1"];
    Post *post2 = [[Post alloc]initWithIdAndTitle:2 title:@"post 2"];

    PostComment *pcom1 = [[PostComment alloc]initPostCommentWithComIdAndPostId:1 postId:1 text:@"post 1 comment 1"];
    PostComment *pcom2 = [[PostComment alloc]initPostCommentWithComIdAndPostId:2 postId:1 text:@"post 1 comment 2"];
    PostComment *pcom3 = [[PostComment alloc]initPostCommentWithComIdAndPostId:3 postId:2 text:@"post 2 comment 2"];

    self.allPosts = [NSMutableArray arrayWithObjects:post1, post2, nil];
    self.AllComments = [NSMutableArray arrayWithObjects:pcom1, pcom2, pcom3, nil];

    NSLog(@"%@", post1.title);
    NSLog(@"%@", pcom1.text);
    NSLog(@"%@", pcom3.text);
    NSLog(@"%ld", (long)pcom2.postId);
    NSLog(@"%ld", (long)pcom3.comId);

    }

- (void)applicationWillTerminate:(NSNotification *)aNotification {
    // Insert code here to tear down your application
}

@end
In the header file – AppDelegate.h – we just added two properties in objective-c. They are used to store all posts and comments. In the implementation file – AppDelegate.m – we add two posts and three comments. After, we output some information of these objects, just to be sure, that everything works fine. If you run the application like it is, you will see the information in the output window of Xcode.
Connecting the data with the view – some more objective-c
The only thing left is to connect the two tables of the view with the data, so we output the posts and comments. The view should work like this: After launching the application, the first table should show all available posts. If the user clicks a row of the table, thus selects a post, the second table should show all comments assigned to this post. In order to work with “NSTableView”, we are required to implemented the protocols NSTableViewDelegate and NSTableViewDataSource (I linked the terms to the official Apple documentation). We just need to tell the interface of the ViewController, that we will implement the methods of these protocols. It looks like this in the header file:
ViewController.h
#import <Cocoa/Cocoa.h>

@interface ViewController : NSViewController<NSTableViewDelegate, NSTableViewDataSource>

@property (nonatomic, strong) IBOutlet NSTableView *tablePosts;
@property (nonatomic, strong) IBOutlet NSTableView *tableComments;

@property (strong) NSMutableArray *displayPosts;
@property (strong) NSMutableArray *displayComments;

@end
We added two properties: “displayPosts” and “displayComments”. We will use them to store the currently displayed posts and comments.
The implementation looks like this (explanation under):
ViewController.m
#import "ViewController.h"
#import "Post.h"
#import "PostComment.h"

@implementation ViewController

- (void)viewDidLoad {
    [super viewDidLoad];

    // Do any additional setup after loading the view.
    [self.tablePosts setDelegate:self];
    [self.tablePosts setDataSource:self];
    [self.tableComments setDelegate:self];
    [self.tableComments setDataSource:self];

    [[NSNotificationCenter defaultCenter] addObserver:self selector:@selector(setPostsToDisplay:) name:@"showPosts" object:nil];

    [[NSNotificationCenter defaultCenter] addObserver:self selector:@selector(setCommentsToDisplay:) name:@"showComments" object:nil];
}

- (void)setRepresentedObject:(id)representedObject {
    [super setRepresentedObject:representedObject];

    // Update the view, if already loaded.
}

- (void)setPostsToDisplay:(NSNotification*)notification {
    self.displayPosts = [notification object];
    [self.tablePosts reloadData];
}

- (void)setCommentsToDisplay:(NSNotification*)notification {
    self.displayComments = [notification object];
    [self.tableComments reloadData];
}

- (NSView*)tableView:(NSTableView *)tableView viewForTableColumn:(NSTableColumn *)tableColumn row:(NSInteger)row {
    NSTableCellView *cellView = [tableView makeViewWithIdentifier:tableColumn.identifier owner:self];

    if ([tableView.identifier isEqualToString:@"TablePosts"]) {
        Post *post = [self.displayPosts objectAtIndex:row];
        if ([tableColumn.identifier isEqualToString:@"ColumnPostId"]) {
            cellView.textField.integerValue = post.postId;
        }
        else if ([tableColumn.identifier isEqualToString:@"ColumnPostTitle"]) {
            cellView.textField.stringValue = post.title;
        }
    } else if ([tableView.identifier isEqualToString:@"TableComments"]) {
        PostComment *pcom = [self.displayComments objectAtIndex:row];
        if ([tableColumn.identifier isEqualToString:@"ColumnCommentId"]) {
            cellView.textField.integerValue = pcom.comId;
        } else if ([tableColumn.identifier isEqualToString:@"ColumnCommentText"]) {
            cellView.textField.stringValue = pcom.text;
        }
    }
    return cellView;
}

- (NSInteger)numberOfRowsInTableView:(NSTableView *)tableView {
    if ([tableView.identifier isEqualToString:@"TablePosts"]) {
        return [self.displayPosts count];
    } else if ([tableView.identifier isEqualToString:@"TableComments"]) {
        return [self.displayComments count];
    }
    return 0;
}

- (void)tableViewSelectionDidChange:(NSNotification *)notification {
    if ([[notification.object identifier] isEqualToString:@"TablePosts"]) {
        NSInteger row = [notification.object selectedRow];
        NSTextField *tf = [[[notification.object viewAtColumn:0 row:row makeIfNecessary:NO] subviews] lastObject];
        NSNumber *postId = [NSNumber numberWithInt:(int)[tf integerValue]];
        [[NSNotificationCenter defaultCenter] postNotificationName:@"getComments" object:postId];
    }
}

@end
Alright – here we have some more things. The first method “viewDidLoad” sets the delegate and datasource to itself. Like this we define, that the methods of the protocols for the tableviews are implemented in this class. After, there are two observers. They listen to the methods “showPosts” and “showComments”, which we will later send from the implementation of AppDelegate. Short explanation: When we send a notification with the name “showPosts”, it will call the method “setPostsToDisplay”. If we send a notification with the name “ShowComments”, it will call the method “setCommentsToDisplay”. This is an easy way to communicate between AppDelegate and ViewController, without the need to call methods on explicit instances.
Ignore the next method “setRepresentedObject”. The two methods after are “setPostsToDisplay” and “setCommentsToDisplay”. Here we receive the posts or comments from the notification object, set “displayPosts” or “displayComments” and reload accordingly the table view.
The method after is called “viewForTableColumn” is the actual implementation of the protocol “NSTableViewDelegate” (click here for the documentation). This method returns a cell view (it will be called for every row). We have several if-statements here. We use them in order to find out, which table and column is currently requested. Therefore we use the identifiers, which we declared earlier using the storyboard.
“numberOfRowsInTableView” is an implementation of the protocol called “NSTableViewDataSource” (click here for the documentation). It returns the number of rows we want to create in the table. For the first table this would be the amount of posts and for the second table the amount comments.
The last method “tableViewSelectionDidChange” is another implementation of “NSTableViewDelegate”. It is called whenever the user selects a row in the table. In our case, we can use it if the user selects a certain post in the first table, to display the comments accordingly in the second table. For this reason, we get the ID of the post which the user selected and send a notification which contains this id. In appDelegate we can look for the comments for this postId and give them back to the ViewController.
The last step is to update AppDelegate:
AppDelegate.m
#import "AppDelegate.h"
#import "Post.h"
#import "PostComment.h"

@interface AppDelegate ()

@end

@implementation AppDelegate

- (void)applicationDidFinishLaunching:(NSNotification *)aNotification {
    // Insert code here to initialize your application

    Post *post1 = [[Post alloc]initWithIdAndTitle:1 title:@"post 1"];
    Post *post2 = [[Post alloc]initWithIdAndTitle:2 title:@"post 2"];

    PostComment *pcom1 = [[PostComment alloc]initPostCommentWithComIdAndPostId:1 postId:1 text:@"post 1 comment 1"];
    PostComment *pcom2 = [[PostComment alloc]initPostCommentWithComIdAndPostId:2 postId:1 text:@"post 1 comment 2"];
    PostComment *pcom3 = [[PostComment alloc]initPostCommentWithComIdAndPostId:3 postId:2 text:@"post 2 comment 2"];

    self.allPosts = [NSMutableArray arrayWithObjects:post1, post2, nil];
    self.allComments = [NSMutableArray arrayWithObjects:pcom1, pcom2, pcom3, nil];

    [[NSNotificationCenter defaultCenter] postNotificationName:@"showPosts" object:self.allPosts];

    [[NSNotificationCenter defaultCenter] addObserver:self selector:@selector(getCommentsForPostId:) name:@"getComments" object:nil];

    }

- (void)applicationWillTerminate:(NSNotification *)aNotification {
    // Insert code here to tear down your application
}

- (void)getCommentsForPostId:(NSNotification*)notification {
    NSMutableArray *commentsToShow = [NSMutableArray array];
    NSNumber *postId = [notification object];
    for (PostComment *pcom in self.allComments) {
        if (pcom.postId == [postId integerValue]) {
            [commentsToShow addObject:pcom];
        }
    }
    [[NSNotificationCenter defaultCenter] postNotificationName:@"showComments" object:commentsToShow];
}

@end
I deleted the NSLog instructions which were there previously. Instead, we have now to instructions for notifications. The first one sends a notification using the name “showPosts” and as object all posts, because we want to display all posts when the application launches. The second one is an observer, which listens for a notification called “getComments”. This notification will be sent from the ViewController, when the user selects a row. In AppDelegate, this will result in the method “getCommentsForPostId”. This method gets all comments which are assigned to the current postId. It will then send a notification called “showComments” and the selected comments as an object. This notification will cause ViewController to display these comments in the second table.
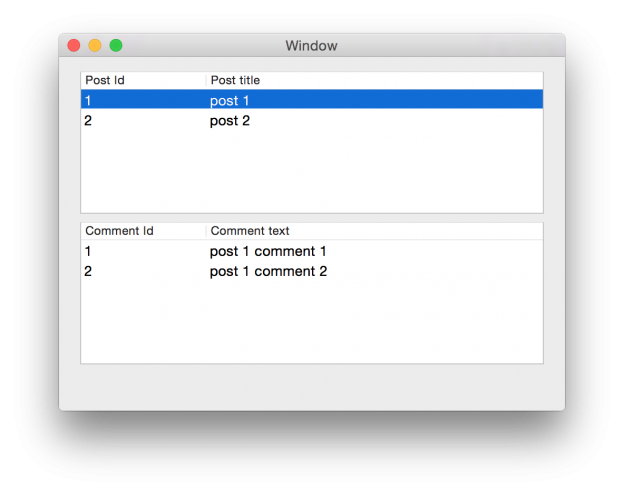
If everything went right you should see the posts and comments after launching the application.

Application after launching it
Other parts of the tutorial:
Second step: Connecting the application to a wordpress blog so it used the service. Click here to view the post.
Thid step: Implementing core data so posts and comments may be saved locally. Click here to view the post.
Excellent tuto.
I just have a problem, with xCode 9. In ‘ ViewController viewDidLoad ‘, the first 4 lines [self.table set …:self] show a warning :
“Sending ‘ ViewController *const __ strong ‘ to parameter of incompatible typify ‘ idNSTableViewDelegate > _Nullable”‘. When I launch the application no text appears, just both empty views.
In your opinion that may I make to solve this problem?
Thank you in advance.
Pingback: Objective-c tutorial: Adding coredata to store posts/comments
Hi. How can I add column dynamicly. This is kinda rigid structure. What if I want to add another column call Time along the way.